Stay tuned for the makeup/hair test and full costume reveal!
Showing posts with label How to. Show all posts
Monday, August 25, 2014
Friday, August 22, 2014
Flame on! Charizard Cosplay Progress: Tail
Almost done! Last night I edged my fabric and bustled this sucker up by hand. I'm so glad I took the time to make that duct tape dress form because that made the process sooooo much easier! I just pinned the fabric to the bodice, pinned up where I wanted to bustle it, and sewed a couple of stitches at each pin up. I gathered the tip of the tail and just secured it with a rubber band for now:
Next, I grabbed the EL Wire I got from the SLC Comic Con Cosplay class and threaded it through the bustling of the tail so it came out the tip. I coiled it around the tip of the tail and secured again with rubber bands. I wrapped some sparkly red, yellow, and orange tulle and wrapped it haphazardly around the wire. I secured again with rubber bands so I could check the effect of the lighting before I secure everything. You can't really tell in the picture because There is too much light coming in my window, but the tip of the tail is actually in shadow and the orange glow coming from the center of the "flame" actually looks really cool!
Tonight I'll attach the tail to the bodice and secure the tip. I still have a couple of details I want to touch up, but as soonas the tail is attached to the bodice I will actually have the whole costume in a wearable state to try on! Yay!
Thursday, August 14, 2014
It's go time! Charizard Cosplay Progress
I realized this week that there are just 3 weeks left until SLC Comic Con! It is still a work in progress, but this week I got the teal added to the wings, made a frame for them out of metal rods, and mounted them to a cardboard base. The cardboard will ultimately be attached to a sweet orange backpack, but the metal rods go around all of the edges so it is sturdy enough to support itself. I also decided this week to make the yellow part of Charizard's tummy a corset/wide belt and braided teal ribbon to use as the ties - I thought the teal would accent the wings nicely. I re-styled the wig a bit so the tips of the horns flare out and look more flame like and I bought orange hair ties so they would blend in better. I left a bunch of hair out in the front because I am still deciding if I want to braid it back or trim bangs... I figure I can decide that once I do my hair/makeup test. I bought some orange eye-shadow and lipstick this week so I hope to do my makeup test this weekend.
Up Next:
- Attach wing frame to backpack & cover ugly cardboard w/orange fabric.
- Clean up and seal fabric edges of wings.
- Add copper scale detailing to pants.
- Sew tail, attach to corset, and set up light effects for flame.
- Hair/makeup test.
- If time - sculpt claws & attach to shoes
- Sew vest for Pokemon Trainer
- Paint pokeballs & attach to belt for Pokemon Trainer
Up Next:
- Attach wing frame to backpack & cover ugly cardboard w/orange fabric.
- Clean up and seal fabric edges of wings.
- Add copper scale detailing to pants.
- Sew tail, attach to corset, and set up light effects for flame.
- Hair/makeup test.
- If time - sculpt claws & attach to shoes
- Sew vest for Pokemon Trainer
- Paint pokeballs & attach to belt for Pokemon Trainer
Tuesday, July 8, 2014
Charizard Cosplay Update: Styling the Wig and Covering the Wings
If there is one thing I've learned from studying costume and makeup design in college it is that
DETAILS MATTER!!!
DETAILS MATTER!!!
In this case, I decided to take my cosplay to the next level by getting an orange wig to match the feel of the character. Since I am doing a humanized interpretation of the character as opposed to a fur suit style costume, I thought it would be really cool to make Charizard's horns out of the hair of the wig. I was inspired by this awesome design:
![]() |
| http://tarnished-sanity.tumblr.com/post/63619720635/pokemon-gijinka |
The wig was thinner and had shorter layers than I would have liked, so I couldn't do the fishtail style lke in the above picture and I had to get creative to get the right thickness to the horns. First, I brushed out the wig, sprayed some water on it, and gave it a good blow dry with some texturizing and volumizing sprays.
*** A note on styling synthetic wigs: Most cosplay wigs are synthetic which means that the hair fibers are actually plastic. Be VERY careful with heat styling! Make sure you blow dry on a mid to low setting and NEVER use a curling iron and/or straightener or you will melt the fibers of the wig. If anyone is interested I can do a more detailed post on styling wigs later.***
Cosplay is a game of "use what you have to make what you want." Example: I actually used the cardboard from a Hamburger Helper box to make two cylinders to form the structure for the horns. Then, I put the wig on my styrofoam head form and positioned them on the head and cut the bottoms at the correct angle to match Charizard's horns.
![]() |
| See? They sweep back from the front of the head. |
I used straight sewing pins to secure the wig and horns to the form to make styling easier - I styled around the pins holding the horns in place and carefully removed them once the style could hold on its own.
First, I pulled the hair around the horns up to cover the cardboard and pinned in place. I added hair bands for support and because I liked the texture it gave. To give added texture like the inspiration picture, I began braiding sections of hair around the base of the horn horns and wrapped it up around the horn and around the base. Once I had something I liked I added a strip of the same orange fabric I am using for the wings to the top of the horn to hide some extra pins and just because I thought it would look cool.
Here is a picture of one of the horns "finished" and the other one in progress:
![]() |
| I say "finished" because I may add more ribbon or braids... |
I cut the scalloped bottom for both wings together and left the top alone. Since this is satin it started to fray where I cut it so I sealed the bottom edge with nail polish so I wouldn't have to sew. Then, I folded down the top over the structure of the wing, hot glued it and pinned it in place, and trimmed the excess fabric. I will glue that last piece of fabric down once I get the wire frame in place - I left it open so it would be easier and I would be less likely to catch the wire on the fabric and rip it.
Next steps: cut out adhesive interfacing and teal fabric for the inside of the wing and iron in place. Then I get to figure out how to do the wire frame to mount the wings to the sweet orange backpack I got.
*** Let me know if you like what you see or if you have any suggestions. Thanks friends! ***
Monday, June 30, 2014
Duct Tape Shenanigans and Charizard Cosplay Progress
I decided last week that I need a dress form if I am to be a proper cosplayer, but rather than spend the $100-$200 to get a plus size dress form (yes, I'm still a bit "curvy"... read: fat) I decided to try something I found on Pinterest and make my own out of duct tape. I realized at the final stage that I should have been taking process pictures, but it is a rather awkward experience so I suppose it was for the best.
The process is fairly simple: Put on a shirt and pair of pants/shorts that you are willing to sacrifice to the cause, get 2-5 rolls of duct tape depending on your size, and find someone you trust a whole lot to wrap you in duct tape. Here is the tutorial that I used and found the most useful: http://offbeatbride.com/2010/11/duct-tape-dress-form
And here is my result:
The process is fairly simple: Put on a shirt and pair of pants/shorts that you are willing to sacrifice to the cause, get 2-5 rolls of duct tape depending on your size, and find someone you trust a whole lot to wrap you in duct tape. Here is the tutorial that I used and found the most useful: http://offbeatbride.com/2010/11/duct-tape-dress-form
And here is my result:
It looks like a creepy, purple amputee and I still need to smooth out the form in a few places and seal the neck, but overall it worked pretty well. It probably won't be sturdy enough to build my wings on, but it will definitely make pattern-making a lot easier and more effective. I will be using this to create the tail piece for my Charizard gijinka cosplay. Speaking of which, I found the perfect shoes!
Thank you little boys' dept of Walmart for trying to bring back the 80's! I also bought some polymer clay to sculpt claws that I will attach to the shoes with E600 adhesive.
Last week I got the second wing wire structure shaped and covered with foam, so fabric comes next! I figured out the shape of the wings in the last post so I will get them cut out tonight and begin the process of attaching the fabric to the structure. I am going to use a hot glue gun to wrap the orange fabric around the frame and heat bond adhesive interfacing to attach the teal fabric to the inside of the wing.
*** Stay tuned for more cosplay fun! ***
Thursday, June 26, 2014
Charizard Cosplay: Part 1 - Wings
Its almost that time again... Convention time! T-minus 70 days until Salt Lake City Comic Con :) The Alpha Geek and I decided to cosplay as Red from the Pokemon games and Charizard - Gijinka style. I almost did the Pokemon X Mega Evolution, but I opted to go traditional so I could be a little more recognizable. I'm not saying every cosplay has to be obvious, but that was my feeling at the time. After looking at some pictures and taking stock of how much work I wanted to put into this, I drew up a quick design on my tablet:
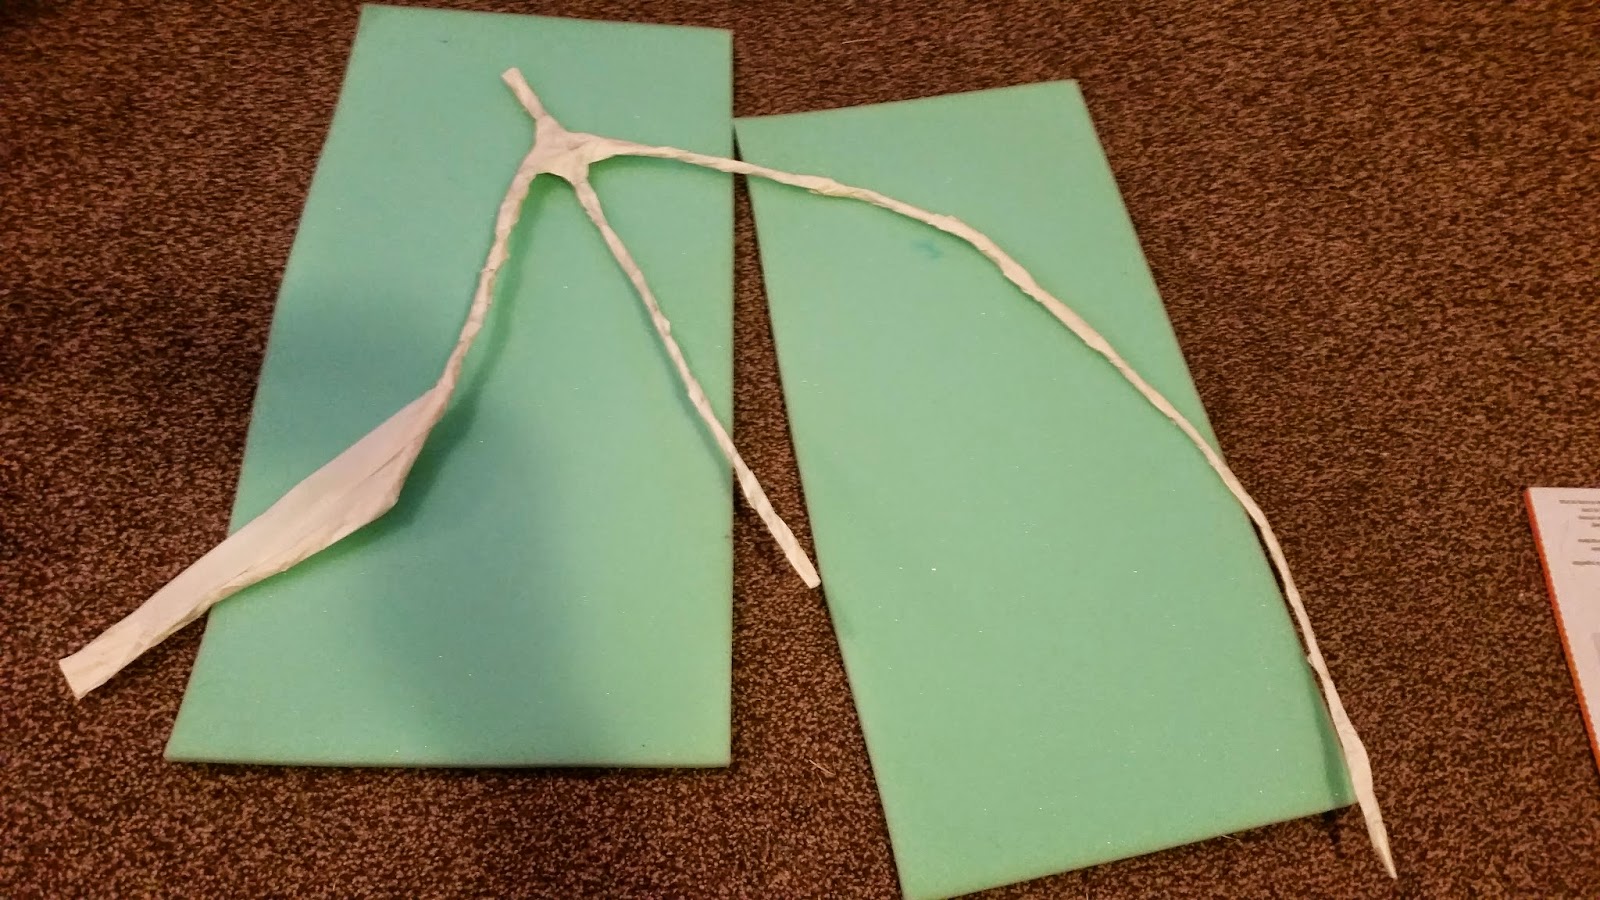
I figured the wings would be the most difficult/most time consuming so I decided to start there. I got some 12 gauge wire wrapped around itself at least 2 thick to make the frame for the wings. I used regular masking tape to cover the pointy edges while I worked:
After I still managed to slice my thumb I opted to cover the whole frame with tape which also served to make it a little more sturdy:
I know, it still looks pitiful, that's where that 1/2 inch foam the frame is laying on comes in! I cut strips of foam and sandwiched the wire frame between them using E600 glue. I put a heavy dictionary on top while it dried to ensure a good seal. Then, I used scissors to round off the edges and get the shape I wanted:
I've been using a pencil on the wrong side of the fabric to figure out the shape of the bottom of the wing and I hope to get it cut out tonight. If you look at the Charizard reference pics above you can see that the long edge of the wing isn't a smooth line so I am going to bend the wire a bit before I cut to get it right.
Also, I should note that the 12 gauge wire is not going to be sturdy enough to support the wings with the wire and fabric so I got a few metal rods that I am going to bend to make the frame that connects the wings to my back and the rods will go up the top "arm" part of the wing to support the whole structure. I debated using PVC, but it was too heavy and bulky. I wanted something with a little give so it is easier to walk through crowds at the con. I can collapse these wings down and if someone bumps me the wires can bend so they don't get whacked with a solid PVC pipe. In the future I am considering doing a Gargoyles cosplay and the sheer size of those wings will require something more sturdy like PVC, but the wire and rods should work to support these smaller wings.
*** Part 2 coming soon! Let me know if you have any questions or suggestions. Thanks! ***
Monday, May 12, 2014
Dr. Who and the Best Mother's Day Gift Ever!!!: River Song's Tardis Journal
My wonderful mother has been a bit of a closet geek for years and she recently discovered Dr. Who. It brings me great joy that she has felt like she can show off her geeky side a bit more around the Alpha Geek and I for obvious reasons ;) As a result, I thought I should make her something epic for Mother's Day to encourage her geeky pursuits:
I assume if you clicked on the link that this project does not need an explanation, but in case it does: This is the journal that the Doctor gives to River Song - my Mom's favorite companion :) ... two emoticons in one post... sorry! Also, this is my artistic interpretation of the journal as opposed to a perfect re-creation and I will explain that more later.
Process:
I apologize for forgetting to take process pictures, but I'll try to explain as best I can in case you would like to make your own... I looked at pictures of River's journal online and found a fabric bound journal at Walmart that looked to be around the right size - it wasn't quite thick enough, but the length and width were pretty close:
| http://www.onecobble.com/2011/09/23/making-river-songs-journal/ |
Note that it is shorter and wider than a lot of the standard journal sizes. During my research I found a template to print a "dust jacket" that I decided to use as a starting point:
If you have ever tried printing a picture off your computer on regular paper using a standard printer you are probably already aware that the print out does not always match the picture on your computer screen. I lost a lot of the contrast in printing and the picture turned out a lot more teal than I would have liked and I could not rectify that entirely, but I am still pleased with the overall result.
After I printed the template I wrapped it around my journal and discovered that it was a little small, so I centered it and made light creases for the spine. I coated the front cover in a thick layer of Modge Podge and applied my template.
* I added a thick layer of the Modge Podge because the journal's original cover was fabric and I wanted to make sure the fabric could soak up enough of the Modge Podge so the cover would actually stay put. If you are working with a vinyl or other smooth-surface journal you will need to do a thin layer of Modge Podge so the paper won't soak it all up and get wrinkled.*
Once everything was dry I used thin strips of duct tape to secure the edges since some of them were not long enough to wrap around the edges of the book. Then, I went over everything with a thin layer of Modge Podge and let it dry. After that layer dried I applied another thicker layer, but this time I used my sponge brush to create a rough, leathery texture instead of just keeping things smooth. I think I did about 3 layers like this and then left it overnight to dry.
The next day I was pretty please with the texture so now it was time to paint. I needed to cover the duct tape, add some contrast, and try to make the teal more blue. I used basic blue, black, and white acrylic paint and a thin paintbrush and went to town while I watched Dr. Who for inspiration. When the paint looked the way I wanted to I added another layer of Modge Podge to seal it. I could have stopped here, but I just watched an episode where they show that cool gold dust from the heart of the Tardis and I remembered the cool gold acrylic I used on my Triforce shoes a while back. I mixed a tiny bit of the gold with my Modge Podge and sponged it on lightly and haphazardly to imitate the magical-ness of the show - and yes, I have decided "magical-ness" is a word now. You can't see it too well in the picture, but it looks awesome and my mom loved it!
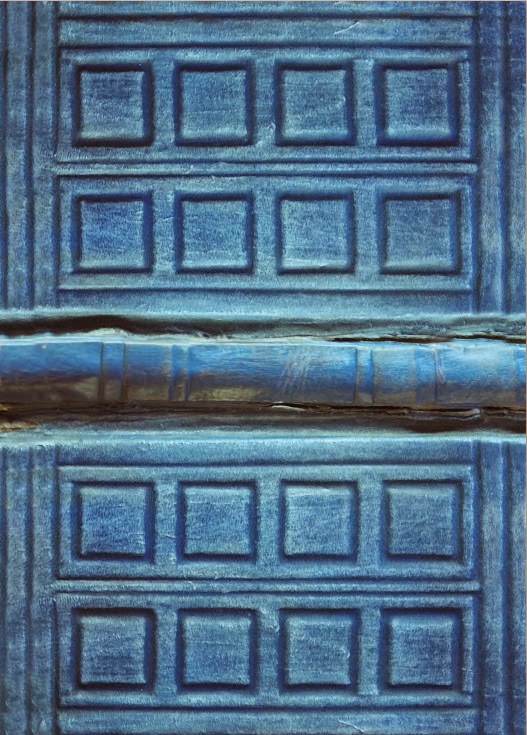
Finally, I wanted to make actual indentations in the cover instead of just using paint. I had some cardboard that I considered using before I glued the cover on, but I wasn't happy with how it looked. Instead, I went back after everything had dried and used the "wrong" end of a pen to physically make the lines you see in the cover. Once I was done I added another thin layer of black in the creases to make them stand out and called it done! I thought about aging the pages, but my husband said I should leave it and let my mom decide.
*** Overall I am happy with the result and I'm looking forward to posting some more geeky craft projects! What do you guys think? Does anyone have any cool ideas that you would like me to try? ***
Thanks for stopping by and please come back soon!
Monday, April 14, 2014
Firefly Cosplay: Kaylee's Jumpsuit
I got the flight suit from a local army surplus store and I bought the patches from ebay (I referenced Maggie's Costume Site for pictures and links). I just used fabric glue to attach them due to lack of time, but I'll go back and sew them later. I used a seam ripper to take the sleeves off (which was more difficult than it sounds because the military makes things to last!) and used scissors to clean up the edges. I didn't re-sew the hem because I don't think Kaylee would have gone to the trouble to do so. Fortunately, since the flight suit was army surplus it was already a bit distressed, but it didn't have any of the engine grease smears that are characteristic of Kaylee. I actually put the suit on, dunked my hands in a mixture of black acrylic paint and water, and wiped my hands on my hips and legs where it felt natural. I also smeared some around my waist and knee as if I leaned up against or knelt in something greasy. I have the perfect shirt to complete the ensemble, but you have to wait a little longer for pictures of the whole thing ;)
Monday, April 7, 2014
Firefly Cosplay: Malcolm Reynold's Boots continued
Hey there friends!
Last week was a bit crazy, but I finally worked on Mal's boots a bit more and they are almost done! Last time I left off after lining the main body of the boot and we were about ready to sew...
Picture #1 below shows the top piece of the boot. In a perfect world it would have the pleather on both sides, but I am short on time so I just rolled the top hem.
Picture #2 shows the boot cover after I sewed the top pieces to the body and the right and left sides of the body together. The color of the cover and shoe look a lot different than they do in real life because the pleather of the boot cover seems to reflect the light differently. I turned the flash off for the third image and it gives a better idea of what the two pieces actually look like together.
Picture #3 you can see that I added a zipper on the inside of the calf like Mal's boots and so the Alpha Geek can actually get the things on! To attach the boot covers to the shoes I had the Alpha Geek actually put them on and then I pulled the front and back edges of the cover down and used fabric glue to secure them. Fabric glue dries pretty quickly so I just held the edges down while it dried. I then had him take the boots off carefully, applied more glue, and used pins to hold everything in place while it dried. The pleather fabric had a bit of stretch so I was able to get the cover to lay pretty nicely. I also added 2 more panels to the front of the shoe since the original Madden shoes used for the show had 5 panels and the ones we got from Ross only had 3. I rolled the curved edge and sewed by hand to get the same raised look of the other panels.
In Pictures #4-5 you can see the trim I added around the seam where the cover meets the shoe. This just covers up any glue that leaked and makes it look more finished. All I did was take about a 1.5 inch by 12 inch strip of the pleather, folded it on itself in thirds lengthwise, and sewed a straight line down the center. I glued the trim on and used pins again to hold it. I left everything to dry overnight and touched up a few places this morning. After work I'll have the Alpha Geek try them on and we'll see how they look with the full costume :)
Last week was a bit crazy, but I finally worked on Mal's boots a bit more and they are almost done! Last time I left off after lining the main body of the boot and we were about ready to sew...
Picture #1 below shows the top piece of the boot. In a perfect world it would have the pleather on both sides, but I am short on time so I just rolled the top hem.
Picture #2 shows the boot cover after I sewed the top pieces to the body and the right and left sides of the body together. The color of the cover and shoe look a lot different than they do in real life because the pleather of the boot cover seems to reflect the light differently. I turned the flash off for the third image and it gives a better idea of what the two pieces actually look like together.
Picture #3 you can see that I added a zipper on the inside of the calf like Mal's boots and so the Alpha Geek can actually get the things on! To attach the boot covers to the shoes I had the Alpha Geek actually put them on and then I pulled the front and back edges of the cover down and used fabric glue to secure them. Fabric glue dries pretty quickly so I just held the edges down while it dried. I then had him take the boots off carefully, applied more glue, and used pins to hold everything in place while it dried. The pleather fabric had a bit of stretch so I was able to get the cover to lay pretty nicely. I also added 2 more panels to the front of the shoe since the original Madden shoes used for the show had 5 panels and the ones we got from Ross only had 3. I rolled the curved edge and sewed by hand to get the same raised look of the other panels.
In Pictures #4-5 you can see the trim I added around the seam where the cover meets the shoe. This just covers up any glue that leaked and makes it look more finished. All I did was take about a 1.5 inch by 12 inch strip of the pleather, folded it on itself in thirds lengthwise, and sewed a straight line down the center. I glued the trim on and used pins again to hold it. I left everything to dry overnight and touched up a few places this morning. After work I'll have the Alpha Geek try them on and we'll see how they look with the full costume :)
Side note: In image #4 you can see the light shoelaces peaking out between the zipper. At this point the laces are accessible so the Alpha Geek will still be able to tighten them comfortably.
*** So, what do you think? Any suggestions? I will try to get pictures
of the full Mal costume and my Kaylee costume up soon! ***
Thursday, March 27, 2014
Firefly Cosplay: Mal's Boots
My wonderful geek husband has been encouraging me to get back into my costuming and crafting hobbies for a while now but it is difficult to find the time an energy when I work full time. Fortunately, I have found a project to motivate me! Salt Lake City Comic Con is hosting a Fan Experience event in April and the Alpha Geek and I decided we really ought to dress up since we didn't in August. As Adam Baldwin will be there, we decided we should finally do the Firefly Cosplay we have been thinking about. I will be cosplaying as Kaylee and my geek will be cosplaying Captain Malcolm Reynolds.
I got the Alpha Geek a prop replica of Mal's gun and dog tags from ThinkGeek for his birthday and our anniversary last year and we ordered the coat, pants, shirt, and suspenders from CosplaySky. While I could have made these items myself, it was actually cheaper to order them when you account for material cost. Instead, I decided to focus my creative efforts on Mal's boots. As it turns out, there really is no accurate replica of them anywhere. Motorcowboy has made some decent replicas out of real leather, but they aren't quite right. If you look closely (and troll fan pages) you can see that his boots are actually made using a Steve Madden shoe for the base with leather boot tops added:
Unfortunately, the Steve Madden shoes are no longer being produced so I had to get creative. I got a pair of brown leather Sketcher's shoes from Ross that have ribbing on the toe:
I also got some brown pleather, black adhesive interfacing, and two 14 inch brown zippers from JoAnne's. I traced around a pair of calf high boots I already own on a brown paper bag to make my pattern.
Based on the image above I did an outer panel and 2 inside panels with seam allowance for the zipper for each boot cover. Then I cut out the pleather and pinned it to the interfacing.

For the elusive ridges on the side I had to get creative again. I cut out strips of cardboard and used fabric glue to attach the cardboard to the wrong side of the pleather like so.

Next, I pinned the adhesive interfacing over the cardboard to sandwich the strips in between.

Tadaa!!! Time to start sewing :)
I'll be posting more pictures of the boots as well as the other costume pieces soon!
I got the Alpha Geek a prop replica of Mal's gun and dog tags from ThinkGeek for his birthday and our anniversary last year and we ordered the coat, pants, shirt, and suspenders from CosplaySky. While I could have made these items myself, it was actually cheaper to order them when you account for material cost. Instead, I decided to focus my creative efforts on Mal's boots. As it turns out, there really is no accurate replica of them anywhere. Motorcowboy has made some decent replicas out of real leather, but they aren't quite right. If you look closely (and troll fan pages) you can see that his boots are actually made using a Steve Madden shoe for the base with leather boot tops added:
Unfortunately, the Steve Madden shoes are no longer being produced so I had to get creative. I got a pair of brown leather Sketcher's shoes from Ross that have ribbing on the toe:
I also got some brown pleather, black adhesive interfacing, and two 14 inch brown zippers from JoAnne's. I traced around a pair of calf high boots I already own on a brown paper bag to make my pattern.
Based on the image above I did an outer panel and 2 inside panels with seam allowance for the zipper for each boot cover. Then I cut out the pleather and pinned it to the interfacing.
For the elusive ridges on the side I had to get creative again. I cut out strips of cardboard and used fabric glue to attach the cardboard to the wrong side of the pleather like so.

Next, I pinned the adhesive interfacing over the cardboard to sandwich the strips in between.

Then, I just followed the instructions on the interfacing to adhere the pieces together.
Tadaa!!! Time to start sewing :)
I'll be posting more pictures of the boots as well as the other costume pieces soon!
Friday, March 21, 2014
It's dangerous to go alone...
My husband saw something like this online that was just a board with hooks for the keys... I decided to take it one step farther and make it a "command center." I found a mail sorter on clearance at Target, used black paint to touch up some nicks, printed the images I wanted to use, got my sponge brush and Mod Podge and went to town!
A note on working with Mod Podge: I applied a thin layer across the entire surface and carefully laid down the images. I let this dry for at least 15 minutes until it felt dry to the touch before I painted another thin layer of Mod Podge over the top to seal it - If you are working with a computer printed image you will want to make sure the ink is completely dry and that first layer of Mod Podge is nice and thin or the ink will smear.
I ended up applying about 3 coats before I was happy with it, but remember to let it dry in between each layer or the paper will get air bubbles and wrinkles. If you do see bubbles start to form, you can go over the bubbles a couple of times with your sponge brush and a little bit of Mod Podge, but don't mess with it too much or you will make it worse. Mine actually had a few bubbles and they went away as it dried.
*** So what do you think? Are you working on any fun, Geek-tastic projects? ***
Wednesday, March 19, 2014
Legend of Zelda Shoes FTW!
*** New things are on the horizon for this humble blog!
Stay tuned for original comics, guest posts, and general geeky goodness!***
But for now, check out what this geek wife does when she is home sick from work:
Materials needed:
A pair of shoes that don't have any seams across the toe area
Gold Acrylic paint
(If your shoes are canvas) Acrylic Paint that matches the color of your shoes
Smallish Paintbrush
Tape (I used electrical tape because it holds better to canvas than clear tape.)
X-Acto Knife (or thin tipped scissors, a steady hand, and patience)
Printed Stencil
Step 1: If you are rich, go buy a new pair of shoes. Or, if you are a normal person like me: dig out a pair of black shoes that you never wear because they are boring and you don't really like bows.
*If the shoes are dirty you may need to clean them with something like Dawn dish soap and let dry thoroughly.
Step 2: Print stencil and carefully cut out design
Step 3 (if needed): Remove lame bow
Step 4: Tape stencil to shoe
Step 5 (if needed): If your shoes are canvas I highly suggest painting an initial coat in a color that matches your shoes because the canvas is going to soak up a lot of paint before you get that nice, bright gold. You could do white underneath because it will help the color pop, but I used black so I could also use it to clean up my lines.
Step 6: Fill in the gold
Step 7: Let dry for a few minutes and then carefully remove stencil
Step 8: Clean up your lines - canvas is rough so it is difficult to get super clean lines, but here's what worked fairly well for me: since my shoes were black I painted around the design again in black and let the canvas soak up the paint. I went over the edges multiple times until the paint smoothed over the texture of the canvas to get clean lines.
Step 9: If you want to add a little extra pizzazz, you can paint the rim of your shoes gold as well.
*Please note that the paint will make the edges harder and a little scratchy so don't do it if you have sensitive feet. I did a thicker coat on the bottom edge and got thinner around the rim that touches my feet so it is more comfortable.
Step 10 (if necessary): I realized the paint made my shoes look all crisp and new except for the soles. I took some q-tips and bleach and cleaned up the rubber so the shoes look brand new!
*Inspired by GlitterMint's post: http://glitter-mint.blogspot.com/2013/03/its-dangerous-to-go-alone-make-this.html
Thank you!
Subscribe to:
Posts (Atom)


.jpg)